How to Attach Transition Strip to Concrete
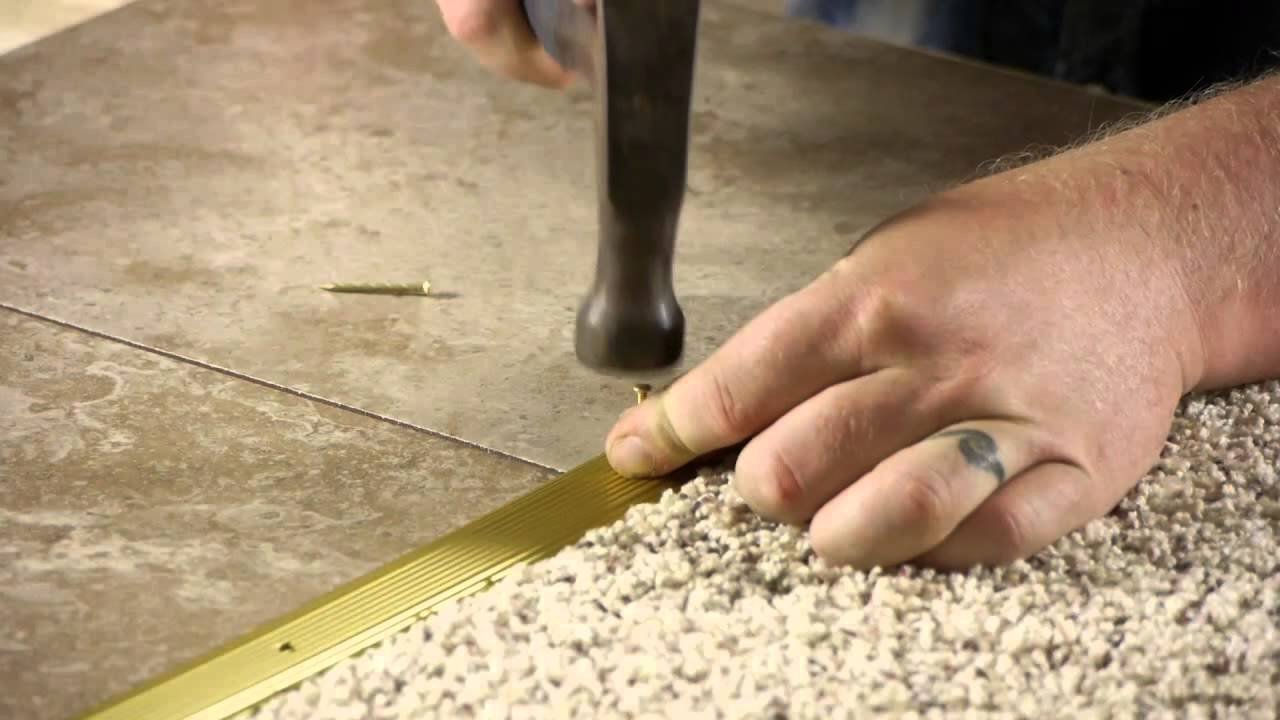
The process of installing transition strips on concrete surfaces requires basic DIY skills to create safer and more attractive environments in residential and commercial areas. The correct installation of transition strips between different flooring materials including hardwood and tile and vinyl and carpet requires knowledge of the proper attachment methods to wood and concrete surfaces. The following guide provides complete instructions from preparation to maintenance to help you achieve expert-level results without complications.
Understanding Transition Strip Types
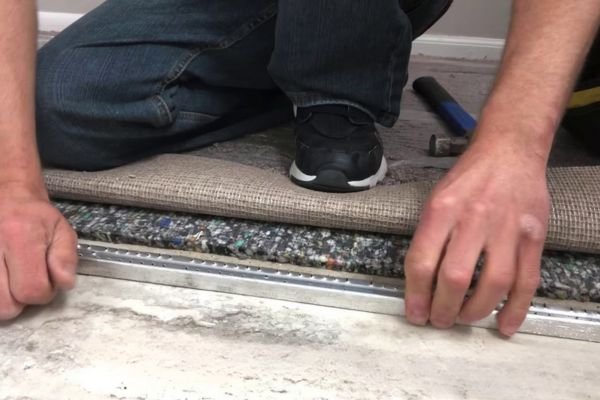
The market provides different transition strip designs which match various flooring requirements. T-molding serves as the best solution when connecting two surfaces of equal height including concrete to concrete or concrete to wood. The Reducer molding serves as the best solution for height variations because it creates a smooth incline between concrete and carpeted floors. Basic transitions require seam binders which provide a simple metal solution. Choose transition strip materials that match your floor durability and design aesthetic from metal, vinyl or wood options. The selection of transition strips for concrete floor applications requires materials that work well with hard surfaces to achieve extended product life.
Required Materials and Tools
Start your transition strip installation on concrete by collecting all necessary materials and equipment. The installation requires a transition strip and construction adhesive (100% silicone or heavy-duty glue) and screws and anchors for mechanical fastening and clear waterproof sealant. The necessary tools for this project include a tape measure and hacksaw and power drill with masonry bits and hammer drill for concrete and safety equipment including gloves and goggles.
For clarity, here's a materials comparison table:
|
Material/Tool |
Description |
Recommended Type |
Estimated Cost (USD) |
|---|---|---|---|
|
Transition Strip |
Bridges floor gaps for smooth transitions |
Metal, vinyl, or wood |
10-30 |
|
Construction Adhesive |
Secures strip without visible fasteners |
100% silicone or Loctite |
5-15 |
|
Screws & Anchors |
Provides strong hold in high-traffic areas |
Masonry screws with plastic anchors |
5-10 |
|
Power Drill |
Drills pilot holes in concrete |
Cordless with masonry bit |
50-100 (if buying) |
|
Sealant |
Prevents water and dust ingress |
Clear silicone |
5-10 |
Preparation Steps
- Begin by performing a complete cleaning operation on the concrete surface.
- Remove dust, debris, old adhesive, or fragments using a vacuum or damp cloth to ensure strong adhesion during transition strip installation.
- Measure the floor seam distance while maintaining at least 1 inch of space for expansion according to flooring standards.
- Check the surface levelness before proceeding with installation because uneven areas require additional thin filler application.
- Protective equipment must be worn because it protects users from dangerous tool edges and flying concrete particles.
Installation Steps
The process of attaching transition strip to concrete requires these 7 specific steps.
- Cut the Track or Strip:Measure and use a hacksaw to trim the metal rail or strip to fit the seam precisely.
- Mark Positions: Place the rail over the gap and mark hole locations if using screws.
- Drill Holes (Screw Method): Use a masonry bit to create pilot holes, insert anchors, and secure with screws for durable floor transition strips.
- Apply Adhesive (Glue Method): Spread a 1/4-inch line of construction adhesive on the back, press firmly for 30 seconds, and let cure for 24 hours.
- Secure the Strip: Snap the covering into the rail if applicable, ensuring it overlaps each floor by at least 1/4 inch.
- Seal Edges: Apply waterproof sealant along both sides to block moisture and dirt.
- Test Stability: Walk over the area to confirm it's secure before full use.
High-traffic areas require screw installation instead of adhesive because screws provide better resistance to movement.
Advanced Tips and Variations
Handle height variations with reducer molding for concrete floor transitions to carpet or tile. In damp areas, use moisture-resistant strips and extra drying time. DIY is fine for small jobs, but pros handle complex seams. Compare methods in this table:
Method Type | Advantages | Disadvantages | Best For |
Glue | Quick, no visible holes, seamless look | May loosen in heavy use | Low-traffic home areas |
Screws | Strong, long-lasting hold | Requires drilling, visible fasteners | High-traffic commercial |
Track System | Easy replacement, flexible | Extra cutting needed | Versatile floor types |
Tape Assist | Temporary fix, aids glue | Not permanent | Quick DIY tests |
Maintenance and Care
Regular inspections should occur every six months to check for wear and tear which can be cleaned with mild cleaning solutions. The product lifespan will increase when you prevent dragging heavy objects across the surface. The process of replacement involves removing old adhesive before installing a new strip.
Conclusion
Learning to properly attach transition strips to concrete surfaces enables you to enhance both functionality and visual appeal in your space. The correct tools combined with proper installation methods will produce durable results. You can find necessary supplies at nearby hardware stores.
Our Products
Latest Articles
Get A Free Sample
Try out the products you are interested in and get free samples. See the quality for yourself and let’s start working together right away.
Get In Touch Today
After you fill out the form, We will contact you within 24 hours.
The first objective will be to understand your needs, then develop a business plan together and provide you with the best pricing!
Address
Workshop No. 3 (Self - designated), Sizhong Industrial Zone, Dazhen Community, Dali Town, Nanhai District, Foshan City
Tel
+86 13392243769
+86 13392243769
senmry@vip.163.com