How to Install Tile Trim at Corners
The process of installing tile trim around corners stands as a fundamental requirement for DIY tiling work because it produces transform your DIY tiling work into professional-grade results when you tackle bathroom showers and kitchen backsplashes professional results while safeguarding sensitive edges from damage. The ability to properly fit tile trim around corners will and floor installations. The guide uses established tiling methods to present step-by-step instructions which work for both interior and exterior corner applications.
Tools and Materials Needed
Start by collecting all required tools and materials before beginning the work. The success of tile trim installation heavily depends on surface preparation work that prevents installation problems:
Category | Items | Purpose |
Measuring Tools | Tape measure, pencil or marker | Accurate sizing and marking for cuts |
Cutting Tools | Mitre box, fine-toothed saw, angle grinder (for metal), trim snips, metal file or sandpaper | Creating precise 45-degree angles or notches for corners |
Application Tools | Notched trowel, spirit level | Spreading adhesive evenly and ensuring alignment |
Materials | Tile trim (PVC, aluminum, or stainless steel), tile adhesive, grout, sealant (for wet areas) | Main components for secure fitting and finishing |
Safety Gear | Gloves, safety glasses | Protection during cutting and installation |
Select trim that matches your tile thickness—typically 8-12mm—for a flush fit. Test a small piece if unsure about the material's behavior.
Preparing the Surface
The surface needs to be clean and dry and level before you start installing tile trim around corners. The area needs to be free from all existing adhesive and debris. When tiling walls you should use a spirit level to create reference lines. Before installing floor trim you should verify that the floor surface is even because unevenness will cause installation problems.
Measuring and Cutting the Trim
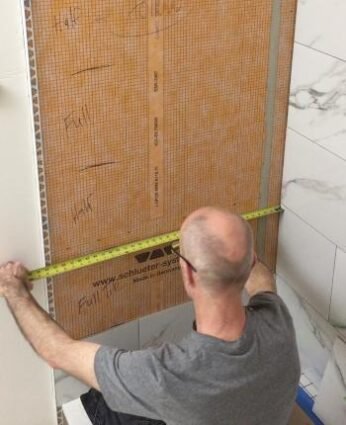
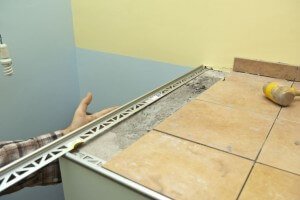
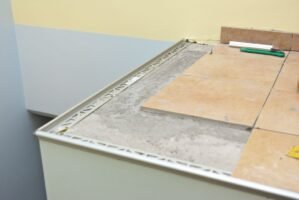
The process of fitting tile trim around corners requires exact measurements as the first step. Measure from the corner point to the outside while adding 2mm for grout spacing.
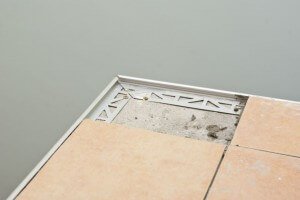
For inside corners, opt for mitered joints:
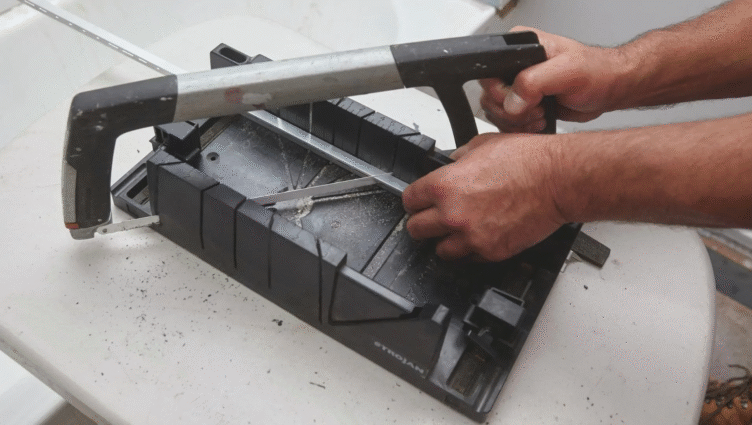
- Use the mitre box to create a 45-degree mark on the trim piece.
- Use a fine saw to cut the trim piece before making a corresponding cut on the adjacent piece.
- Use a file to smooth out the edges which have developed burrs.
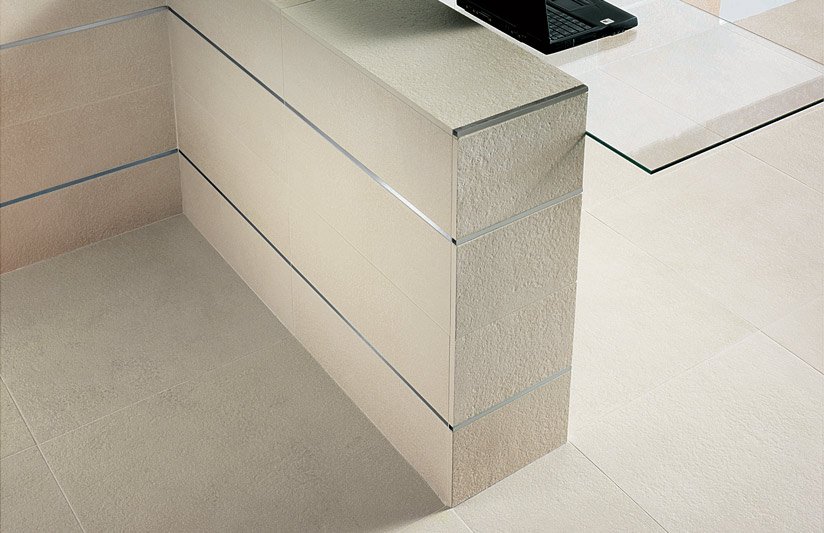
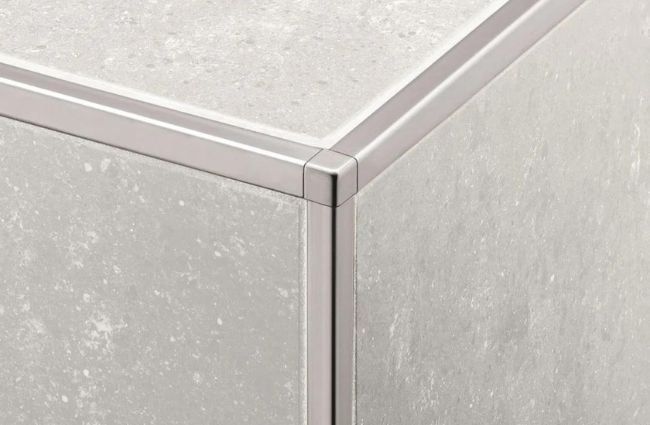
For outside corners, you have two main methods:
Mitered Joints: The process for outside corners mirrors inside corners since you cut both pieces at 45 degrees before performing a dry fit to check alignment.
Notch and Bend: Cut a triangular notch from the back of the trim material using snips before bending it into place for flexible installation on surfaces with irregularities.
The process of fitting trim around corners becomes challenging when angles do not match correctly so always perform a dry fit check before applying adhesive.
Installing the Trim
Apply tile adhesive to the back of the trim pieces or to the surface using a notched trowel. The trim should fit tightly against tile edges while you apply firm pressure to create a solid bond. The corner tile edging requires precise mitered ends which should fit together perfectly without any space between them. A spirit level helps you verify that the installation remains straight and vertical. Use a damp cloth to remove any surplus adhesive right away.
The installation of sealant along joints and grout space in wet areas such as showers will provide waterproofing protection. The adhesive needs a complete overnight drying period before you can continue with your work.
Tiling Around the Trim
Begin placing tiles near the trim edge after the trim installation has completed. The corner tile edging will blend seamlessly with the surrounding tiles. The external corner trim functions as a protective element which boosts the overall durability of the installation.
Finishing Touches
After completing the tiling process you should fill the spaces with grout while selecting a color that matches your tile design for a unified appearance. The application of grout sealant becomes essential for bathroom areas because it blocks water penetration through the grout lines. A final check verifies that all components are properly aligned and securely fastened.
Common Mistakes and Tips
Avoiding errors is vital for successful DIY tile corners. Here's a table summarizing frequent issues:
Mistake | Cause | Solution |
Uneven Joints | Poor measurement | Measure twice, cut once; use a mitre box |
Rough Edges | Dull tools | Sharpen or replace blades; file after cutting |
Loose Trim | Insufficient adhesive | Apply evenly with trowel; press firmly |
No Grout Gap | Over-tight fitting | Leave 2mm space for expansion |
Material Mismatch | Wrong trim depth | Match to tile thickness plus adhesive layer |
Skipping Dry Fit | Rushing process | Always test assembly before gluing |
Tips for success: Select durable trim materials that will last long and follow product instructions while working with practice pieces. Three-way corners require specialized edge corners or bullnose alternatives when you want to achieve a seamless finish without using trim.
The key to successful corner tile trim installation lies in making accurate cuts and proper installation techniques. The method produces both a refined appearance and longer-lasting results for your tiling work. Your ability to work with miter cut tile trim will improve through practice which will help you turn difficult corners into design focal points.
Our Products
Latest Articles
Get A Free Sample
Try out the products you are interested in and get free samples. See the quality for yourself and let’s start working together right away.
Get In Touch Today
After you fill out the form, We will contact you within 24 hours.
The first objective will be to understand your needs, then develop a business plan together and provide you with the best pricing!
Address
Workshop No. 3 (Self - designated), Sizhong Industrial Zone, Dazhen Community, Dali Town, Nanhai District, Foshan City
Tel
+86 13392243769
+86 13392243769
senmry@vip.163.com